Impedance Spectroscopy

Circuit Cellar Magazine Issue #344 features this article by Brian Miller, using AD5933 and Teensy LC.

Measurement of impedance over a range of frequencies can be useful for testing speakers & microphones, monitoring corrosion in metals, and biomedical applications.  Pick up a copy of Issue #344 for the full build details, including schematics & access to the software.

Console Emulators Collection

Jean-Marc Harvengt has done some pretty amazing work with a collection of console emulations, including the Atari 2600/5200, NES, Colecovision, and Philips Odyssy.

Jean-Marc was inspired by  Frank Bösing’s work on emulating the Commodore 64.  Currently the collection supports the Atari2600, Philips Videopac/Odyssey, colecovision, NES and Atari 5200 consoles; and the Zx80/Zx81, Zx Spectrum, and Atari800 computer cores.

All the emulators support both ILI9341 TFT and VGA output.

There’s some pretty amazing work going on here that brings up some serious nostalgia.

Code for the collection is available on GitHub.


Vortex Manipulator

Roger Parkinson made a very cool Vortex Manipulator, complete with a Dalek detector

Inspired by the vortex manipulator worn by Captain Jack Harkness of Dr Who and Torchwood, this steampunk-esque wrist mounted device includes a lot of useful features.  In addition to having clock, it also has a compass, picture gallery, heart rate monitor, and Dalek detector.

The device is powered by a Teensy 3.2 and uses an ILI9341 touchscreen for the interface.  The Teensy worked out well as a development platform for the project.  It had plenty of capacity to add more features as the project progressed, such as a heart rate monitor with an I2C interface.

Detailed information about the build can be found on this page.

Code and Eagle files for the project can be found on GitHub.


Music Reacting Infinity Mirror

Forum user Haybur upgraded his LED display from college into in a sound reactive infinity mirror.

The first part of the upgrade was using WS2812 LEDs and mounting them on a wall, then someone suggested turning it into an infinity mirror.

The memory and processing power of the Teensy 3.6 with Audio Shield and using the audio library along with the OCTOWS211 library made the project happen.

Interactive Bumblebee Costume

Ian Cole and a team of makers at MakerFX transformed a wheelchair into an amazing interactive Bumblebee costume.


Magic Wheelchair, a nonprofit organization that builds epic costumes for kids in wheelchairs, matched ATMakers to a kiddo for a wheelchair build.  ATMakers joined forces with MakerFX to build a wheelchair costume in 3 short weeks – in time for the Assistive Tech Industry Association conference.

Alex, the young man receiving the wheelchair uses assistive technology devices to communicate, so as part of the build the team decided their Bumblebee needed to be interactive using a keyboard.  The interactions they selected could be usable by Alex and worked into his physical therapy in the future.

The dashboard has a capacitive touch horn, two assistive technology buttons, a 320×240 LCD video screen, and 3 addressable LED rings.  The dashboard sends commands to the costume using USB MIDI notes.  This allows the costume to be controlled by either the dashboard or a keyboard.  All the controls and LEDs are powered by a Teensy 3.6 with a Teensy Audio Shield.  They used the FASTLED Library and the Non-blocking WS2812 LED Library to control the LEDs.  The USB Host capabilities of the Teensy 3.6 were used for the MIDI connection.

Code for the project is available in this MakerFX GitHub repository.

SBUS Tutorial by Bolder Flight

Brian Taylor of Bolder Flight has continued his great series of tutorials with the latest covering SBUS, a relatively new protocol for servos.

SBUS has the advantage of allowing up to 16 servos to be be bussed of a single cable.  The first tutorial in the series is an introduction to SBUS and finishes with commanding a few servos to move.  The second tutorial in the series focuses on reading SBUS packets.  The third tutorial in the SBUS series brings together the PWM and  SBUS tutorials to create an SBUS to PWM converter.

The tutorials use Bolder Flight’s SBUS Backpack.  This handy board has pinned out 8 SBUS outputs for easy integration with standard servo connectors, and it come ready to plug in your Teensy 3.2.

If you want to learn more about controlling servos using PWM and SBUS, it’s well worth checking out these tutorials.

Password Keeper

David Hend made a very convenient password keeper.

This compact, low-cost, device features AES-256 bit encryption and stores data on an removable SD card for back up and safekeeping.  Not only does it store passwords, but it has the ability to generate 16 character mixed case passwords as well.

This Instructibles page gives information on how to build your own.

Code for the project can be found on GitHub

Touch Piano DIY Circuit Board

Michael Sobolak made a cool little DIY touch piano.

Michael made this cool little MIDI Controller by first etching his own PCB that he designed in Illustrator using printer toner transfer and copper etching solution.  There’s a bit of tricky soldering to the TouchSense inputs on the bottom of the Teensy, but the rest of the soldering is pretty simple.

Abelton Live was used for the sound libraries for this project, but it should also work with Garage Band or other digital audio workstation (DAW).

Code for the project can be found on this Instructibles page.


Genesynth

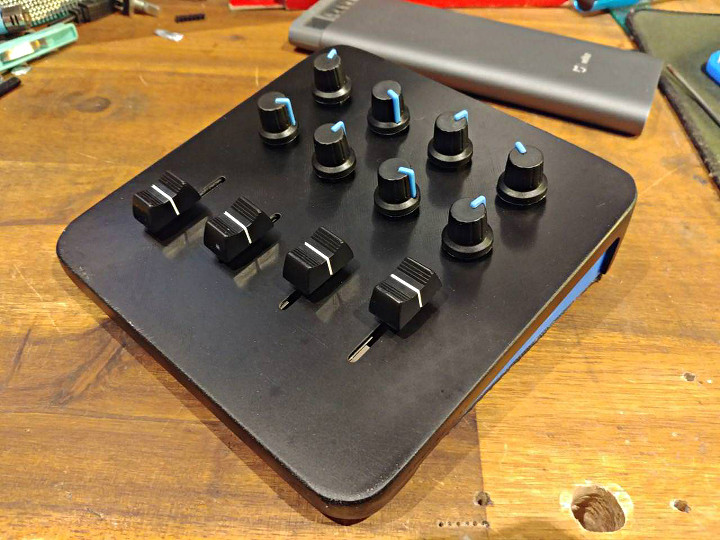
Thea Flowers built a really cool Sega-Genesis inspired synthesizer, the Genesynth.

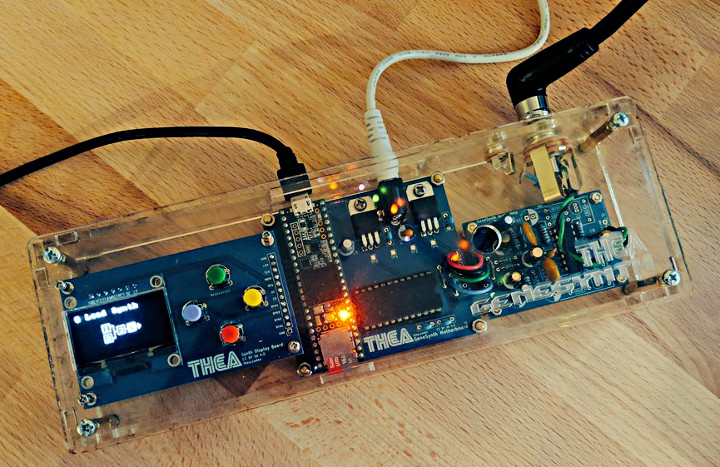
Thea had been toying around with building a synthesizer for a while but was lacking inspiration, then she came up with the idea to build a synth using the same chip as the Sega Genesis.  The Genesis was one of the last consoles to feature a synthesizer instead of samples and CD playback.  This created the distinctive sound of the soundtracks to their iconic games.

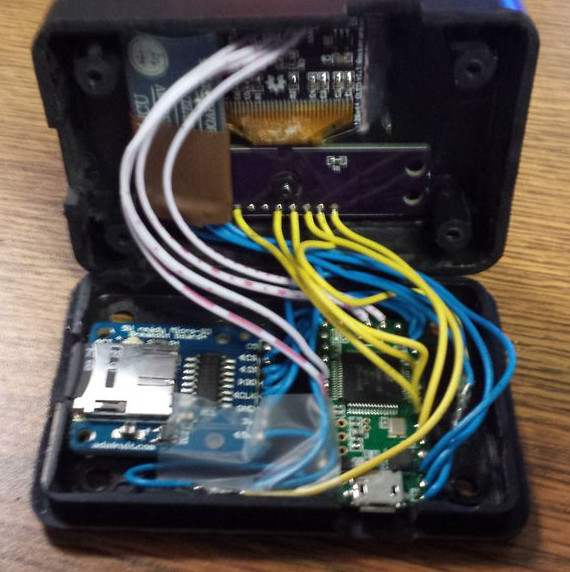
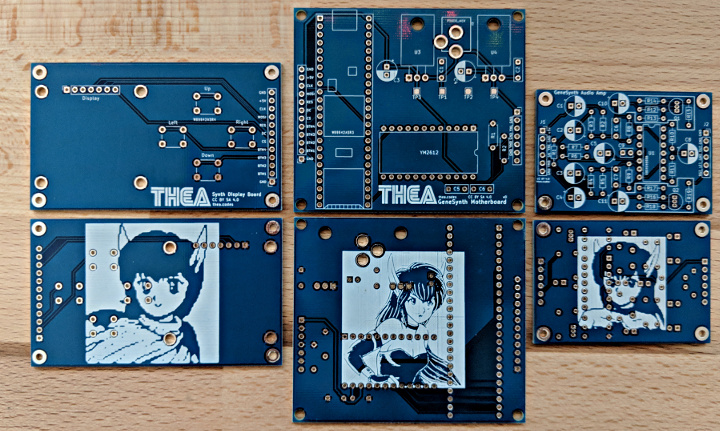
The Genesynth uses the Yamaha YM2612 FM syntheses chip, the same chip used in the Sega Genesis.  A Teensy 3.5 interfaces between the chip and a USB-MIDI connection.  A high-quality audio amplifier was used.  While it’s far better than the original Genesis amplifier, it still retains the same filter roll-off so you can hear the chip’s9-bit DAC’s distortion.

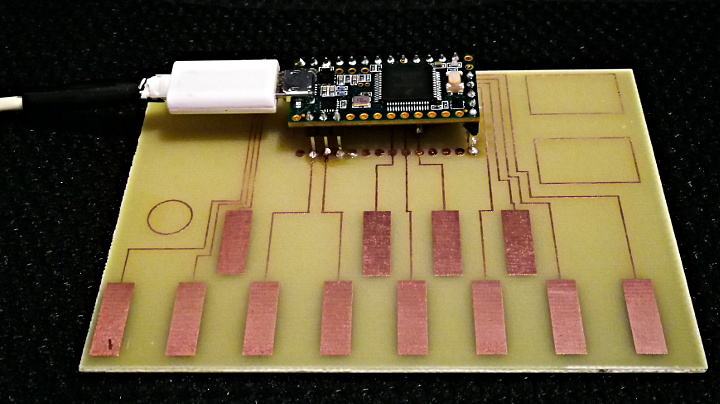
Thea says that the project took weeks of research, months of iteration, and nearly a year of programming.  This was not only her first synthesizer build, but her also her first hardware build.  It also gave her the opportunity to learn to make PCBs, which she did with style.

This Twitter Moment is a collection of her Tweets about the project.  It includes some short audio clips so you can hear the Genesynth in action.

She has some great blog posts about the build process, including the Research, Basic Communication, Proper Audio, and PCBs and Noise Elimination.

You can also read a write of the project over on Hackster.io

Finally, all build information including code and PCBs files are available on GitHub.