Arduino 1.8.9 has a new Pluggable Discovery feature, which began as a contribution from Teensy. Ports can now be customized to support any protocol.

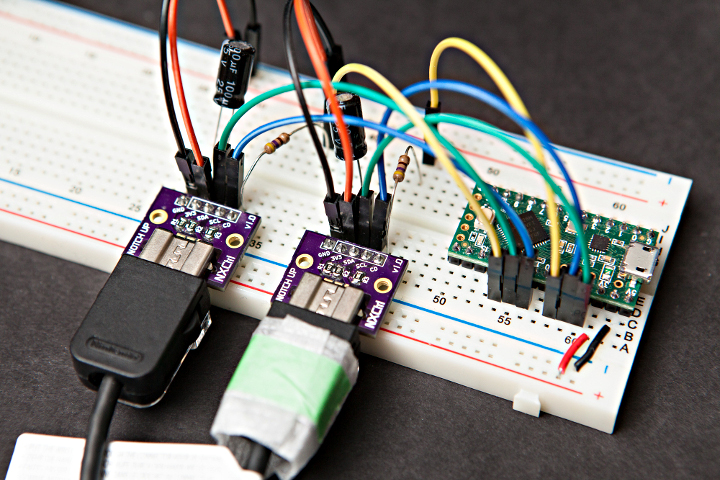
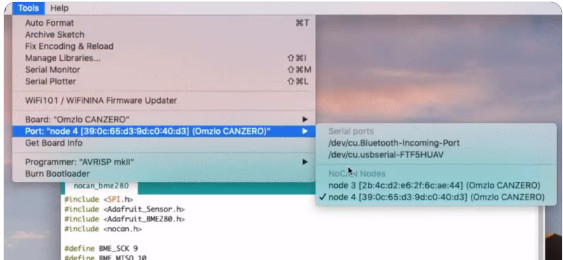
Already Omlzo is using Pluggable Discovery with CAN bus.
In this article, I’ll dive into the details needed to use Pluggable Discovery. But first…
A Brief History
Since the first Arduino software in 2005, the main way to upload code to boards has been by serial ports. In 2008, support for in-circuit programmer hardware was added, where you select a type of programmer rather than a port. In 2013, port detection and selection in the Ports menu was expanded to include network ports for Arduino Yun. Around that time, Arduino also became highly configurable by recipes in platform.txt, based on a major contribution from Mark Sproul & Rick Anderson. But until now, Arduino has supported detecting only 2 types of ports, either serial or network (using Yun’s specific protocol), with the only way to customize being dedicated programmer hardware. Protocols other than serial & Yun’s network just weren’t supported for the Ports menu.
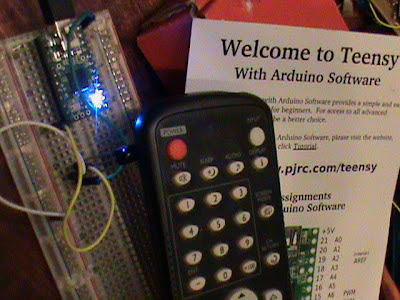
Teensy has used HID protocol, not Serial, for code uploading since its launch in 2008. Using Teensy with Arduino was somewhat awkward. When running a program implementing USB Serial, Teensy would appear in Arduino’s list of serial ports. But with HID or other non-serial protocols, no port would be shown. Teensyduino’s upload process could automatically detect Teensy in those modes, so uploading would “just work” even though the ports menu indicated no ports available. When things went wrong, like this infamous Windows 7 driver bug, lack of reliable ports display made confusing situations hard to understand.
In early 2017, I started work to improve how Teensyduino integrates with Arduino. A dedicated “teensy_ports” utility watches for Teensy’s USB devices to be added & removed. Inside the Arduino IDE, I added a 3rd type of port to the DiscoveryManager class, using this utility’s info. Finally, Teensy could be seen in the Ports menu even with running in a non-Serial mode. You could choose exactly which board to use for upload, rather than hoping the automatic detection would find the right one.
In a June 2018 conversation with Massimo Banzi, Cristian Maglie and other Arduino developers, it was decided that I would contribute this code to Arduino. A flexible JSON format would replace the original single-line text, so anyone could use it, and Arduino can adapt the format in the future. After a lengthy process, where Cristian rewrote and greatly improved the JSON parsing, in March 2019 Arduino 1.8.9 was finally released with this new “Pluggable Discovery” feature.
JSON Data Format
The first step to using Pluggable Discovery is to write a “discoverer” utility which sends information to the Arduino IDE as your board is connected and disconnected. Data is sent to Arduino on stdout, and Arduino may send you commands on stdin.
Here is a sample of the JSON data “teensy_ports” sends to Arduino 1.8.9 when running on Linux.
{
  "eventType": "add",
  "port": {
    "address": "/sys/devices/pci0000:00/0000:00:14.0/usb4/4-14/4-14.1/4-14.1.4",
    "protocol": "Teensy",
    "protocolLabel": "Teensy Ports",
    "boardName": "Teensy 3.6",
    "label": "/dev/hidraw5 Audio",
    "identificationPrefs": {
    },
    "prefs": {
      "vendorId": "16C0",
      "productId": "04D2",
      "serialNumber": "0"
    },
    "online": "true"
  }
}
Here is a quick attempt to document these fields. Please understand these fields may change meaning, or others may be added by future Arduino releases. Hopefully in the future Arduino will add official documentation for this JSON format.
-
eventType: Either “add” when a device is detected and Arduino should begin showing it in the Ports menu, or “remove” when disconnected and the Ports menu should no longer show it. If information changes, or more information becomes available, multiple “add” messages may be sent to cause Arduino to update the Ports menu. The eventType “error” is also supported. See Discoverer Commands below for details.
-
port: A container for all of the information about the port.
-
address: A unique identifier for this port. The address is not shows in the Ports menu, but does appear in the status bar on the bottom of the Arduino IDE windows when the port has been selected. The address is the primary info you would give to your uploader utility. See “Integrating With Your Uploader” below for details.
-
protocol: A unique (or at least distinctive) name for the communication protocol the port uses. Currently Arduino 1.8.9 ignores this field, unless it is “serial” or “network”. This name can be passed to your uploader utility.
-
protocolLabel: The name of your type of port, as shown in the title of a sub-section of the Ports menu. Currently there is no way to adapt this field to different languages. This info can also be passed to your uploader utility, though typically the “protocol” field would be used rather than this name meant for display to the user.
-
boardName: The name of the board. This should probably match one of the names you define in boards.txt, though Arduino 1.8.9 does not currently enforce any requirements.
-
label: The human readable name for the port, to be shown as a selectable item in the Ports menu.
-
identificationPrefs: Arduino 1.8.9 does not make any use of this field.
-
prefs: This is meant to collect info about the port, such as the info shown by “Get Board Info”. However, Arduino 1.8.9 does not make use of this field for non-serial ports. Hopefully future versions will fix this.
-
online: While not used by Arduino 1.8.9 for non-serial ports, this should normally be “true” when eventType is “add” and “false” when eventType is “remove”. With serial ports, the port’s online status can be momentarily false when Arduino is attempting to send a command to the board to automatically reboot into its uploading or bootloader mode.
When a port should be deleted, only the eventType and address fields are required. Here is a sample of the JSON remove message teensy_ports transmits.
{
  "eventType": "remove",
  "port": {
    "address": "/sys/devices/pci0000:00/0000:00:14.0/usb4/4-14/4-14.1/4-14.1.4",
    "online": "false"
  }
}
Like all programs which print to stdout, buffering may exist between your output and Arduino’s reception. Composing the entire JSON message in a buffer, then using a single write and flush to stdout is the most efficient way. Arduino is using the Jackson library to parse your JSON messages, so sending piecemeal, with or without newlines or other optional white space should also work.
Discoverer Commands
The Arduino IDE will also send your discoverer commands on its stdin stream. These are not JSON. They are plain text commands, terminated by a single newline character.
-
START_SYNC – Begin running in sync mode, where your program transmits JSON messages automatically as the device change events occur.
-
START – Begin running in polled mode, where Arduino will send a “LIST” command at regular intervals.
-
LIST – In polled mode, this command is meant to prompt your program to scan for changes.
-
STOP – Stop running.
Future versions of Arduino may behave differently, so please understand the following behavior is specific to version 1.8.9.
When Arduino runs your discoverer, it will send a single START_SYNC command. If you do not need polled mode, no response is needed or expected. Your program simply transmits JSON messages as it detects ports, starting with “add” eventType messages all the ports currently available, and then more “add” or “remove” messages as available ports change.
If you require polling mode, you would transmit this JSON message.
{
  "eventType": "error",
  "message": "START_SYNC not supported"
}
Upon receiving this message, Arduino should transmit “START” and then send “LIST” at regular intervals. If your discoverer is unable to detect hardware changes as they occur, you can design your code to wait for “LIST” and then check whether ports have changed.
With polling, typically you would need to design your discoverer to keep in memory a list of the ports it has previously transmitted to Arduino. When you poll which ports are actually available, your discoverer is responsible for detecting when any port you have previously transmitted an “add” eventType is no longer present. You must transmit the “remove” eventType, to cause the Arduino IDE to no longer offer that port to users in the Ports menu.
A list of previously detected ports can also help you avoid repeatedly sending the same info as your discoverer checks which ports currently exist. But this is not required. As long as the “address” field remains the same, Arduino Pluggable Discovery treats a redundant “add” eventType as a request to update the port’s info. Sending the same info repeatedly is inefficient, but harmless.
Polling mode may not be working properly in Arduino 1.8.9. Most testing was done with sync mode.
Arduino 1.8.9 transmits STOP only when the user closes the entire IDE, just before your program is terminated. There is no guarantee your discoverer will continue running long enough to actually receive the STOP message.
Future Arduino software may send START_SYNC, START and STOP at different times, but with 1.8.9 the start messages are used only as the Arduino IDE starts up, and STOP is sent only when the user quits the software.
Running Your Discoverer
Like everything else customizable in modern Arduino, you create a recipe in your platform.txt file which tells Arduino to run you discoverer. Here is a recipe for “teensy_ports”.
## Teensy Ports Discovery (Arduino 1.8.9)
discovery.teensy.pattern="{runtime.ide.path}/hardware/tools/teensy_ports" -J2
This recipe assumes the teensy_ports utility is installed in the hardware folder, inside the Arduino software. Because the recipe starts with “discovery”, Arduino 1.8.9 detects it is a command for a pluggable discovery program. It will be run as Arduino starts up. Use of {runtime.ide.path} only works if your discover is copied to a locating inside Arduino’s folder.
The “-J2” is parameter given to “teensy_ports”, the same as if you had typed “./teensy_ports -J2” on the command line. While unlikely to be needed, you can build almost any command line your discoverer might need. In this case, the JSON format changed during development, so “-J2” tells teensy_ports with JSON dialect to output.
If your board is installed by Arduino’s Boards Manager, your discover is meant to be defined and installed as a tool and referenced with {runtime.tools.TOOLNAME.path}. See this comment from Cristian for more detail.
Integrating With Your Uploader
Now that your discover can find your board’s custom port, and the user can select it in the Ports menu, you need a way to actually pass the detected info to your board’s uploader program.
Fortunately this part is easy. The macro {serial.port} in your uploader recipe in platform.txt will be replaced by whatever text your discoverer provided in the JSON “address” field.
tools.yourtoolname.upload.pattern="{runtime.hardware.path}/upload_program_name" "{build.path}/{build.project_name}" "{serial.port}"
Yes, it’s still called “serial.port” in these substitution patterns, even though we can now (theoretically) extend the Arduino IDE any sort of protocol.
While your uploader probably only needs the unique address field and the pathname to find the code Arduino compiled, you can also pass some of the other JSON fields to your uploader. Here is the recipe Teensy is currently using.
tools.teensyloader.upload.pattern="{cmd.path}/teensy_post_compile" "-file={build.project_name}" "-path={build.path}" "-tools={cmd.path}" "-board={build.board}" -reboot "-port={serial.port}" "-portlabel={serial.port.label}" "-portprotocol={serial.port.protocol}"
Hopefully Arduino will eventually document the mapping from JSON fields to recipe substitution names. These were found by reading the Java source code and some experimentation.
Troubleshooting
What could possibly go wrong?!
Arduino 1.8.9 has a fair amount of debugging code built in to help you see how Arduino is running your discoverer, and what it’s receiving. To enable the debug output, add this line to your preferences.txt file.
discovery.debug=true
If you’re not sure where your preferences.txt file is located, click File > Preferences and look at the info in the button part of the Preferences dialog.
Minor Issues In Arduino 1.8.9
Polling mode may not work.
The substitution macro {runtime.hardware.path} very often used in platform.txt recipes is not yet supported. Teensyduino adds a patch to Arduino 1.8.9 to support this in discovery recipes. If you prefer {runtime.hardware.path}, installing Teensyduino may be a short-term solution. Hopefully this patch will be merged into future Arduino versions.
Other substitution issues may exist in Arduino 1.8.9. Pluggable discovery is brand new.
Pluggable Discovery does not yet exist in Arduino’s Command Line Interface software. Using Pluggable Discovery today means your board’s package can not work with the CLI. Cristian started work on Pluggable Discovery for CLI months ago, but since January there appears to be no progress. Hopefully as more people use Pluggable Discovery to support non-Serial protocols, we’ll see progress on bringing it to CLI as well.
Serial Monitor
Of course the other key Arduino IDE feature missing to truly support boards with any type of port is the serial monitor window. And also the serial plotter.
Teensyduino currently adds several patches to the Arduino IDE to install a customized serial monitor. It communicates, via stdin/stdout/stderr with a “teensy_serialmon” utility program. Hopefully in the future, these patches can eventually be contributed to Arduino as as “Pluggable Serial Monitor” feature which complements Pluggable Discovery.
But at least for now, if you are interested in extending the Arduino IDE to work with boards using completely different communication protocols, hopefully the Pluggable Discovery contribution and this article can help.