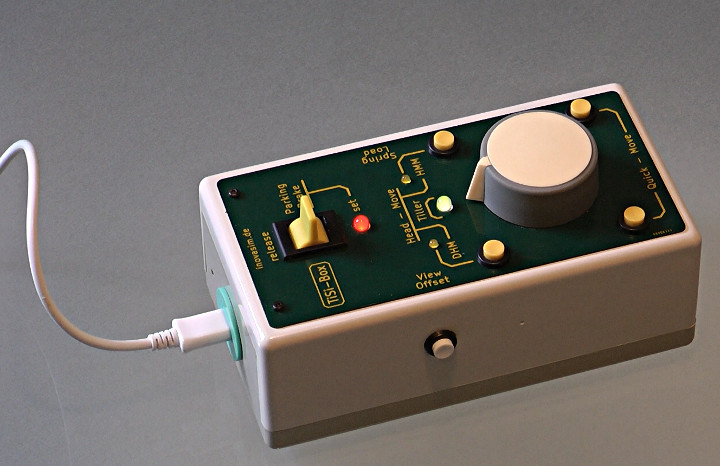
Hubert (forum user inovasim.de) has created the TiSi Box, a hardware add on to X-Plane that allows for a new kind of visual control.
The TiSi-box combines the nose wheel steering with the sight control using a self-centering rotary knob. It interfaces with the X-Plane flight simulation software though a Teensy 3.2.
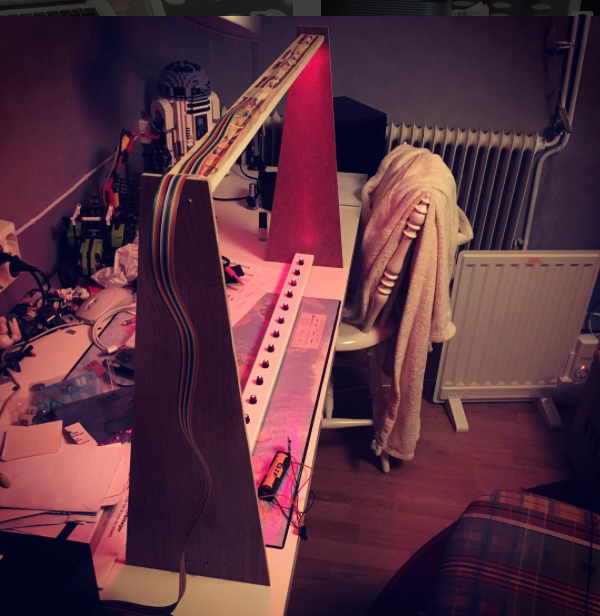
Johan Berglund built a very cool 16-note, multi-scale laser harp.
This impressive build features 16 beams, MIDI over USB and 5-pin DIN, adjustable octave and transposition, and and extensive list of selectable scales.
This project page offers detailed information on how to build your own as well as schematics. The code is available on GitHub.
The project uses a Teensy 3.2 and a couple of small displays and uses a modified version of the Uncanny Eyes sketch. The modifications make the eyes look up and down when a quarter is inserted.
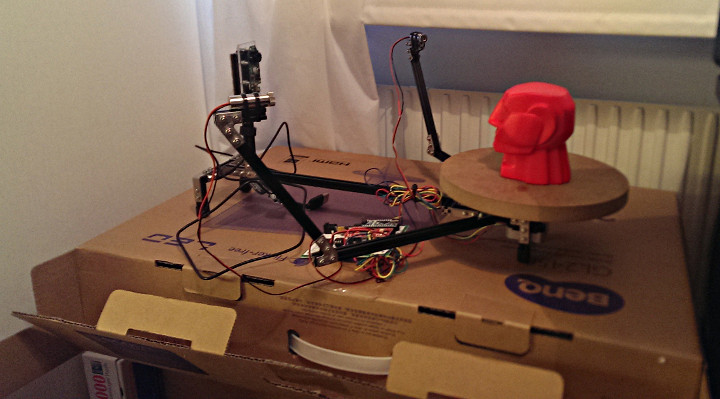
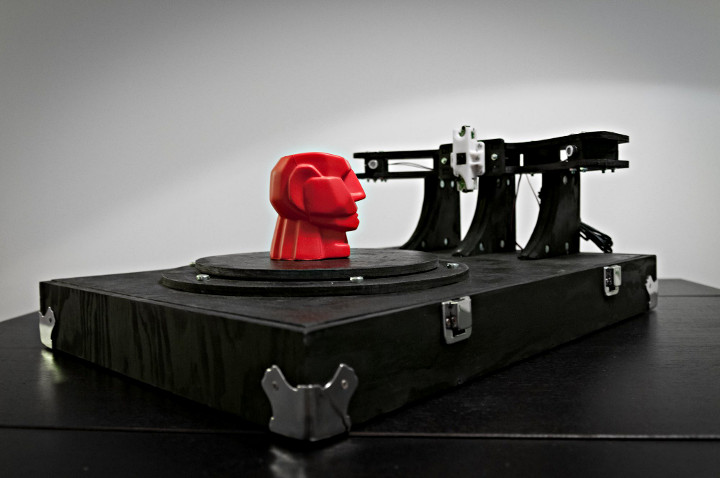
FilleK built a 3D scanner using a webcam and a couple of line lasers.
The scanner works by setting an object on a rotary table and a Logitech C920 webcam to capture images of it to a computer over USB. All the hardware (except for the webcam) is controlled by a Teensy.
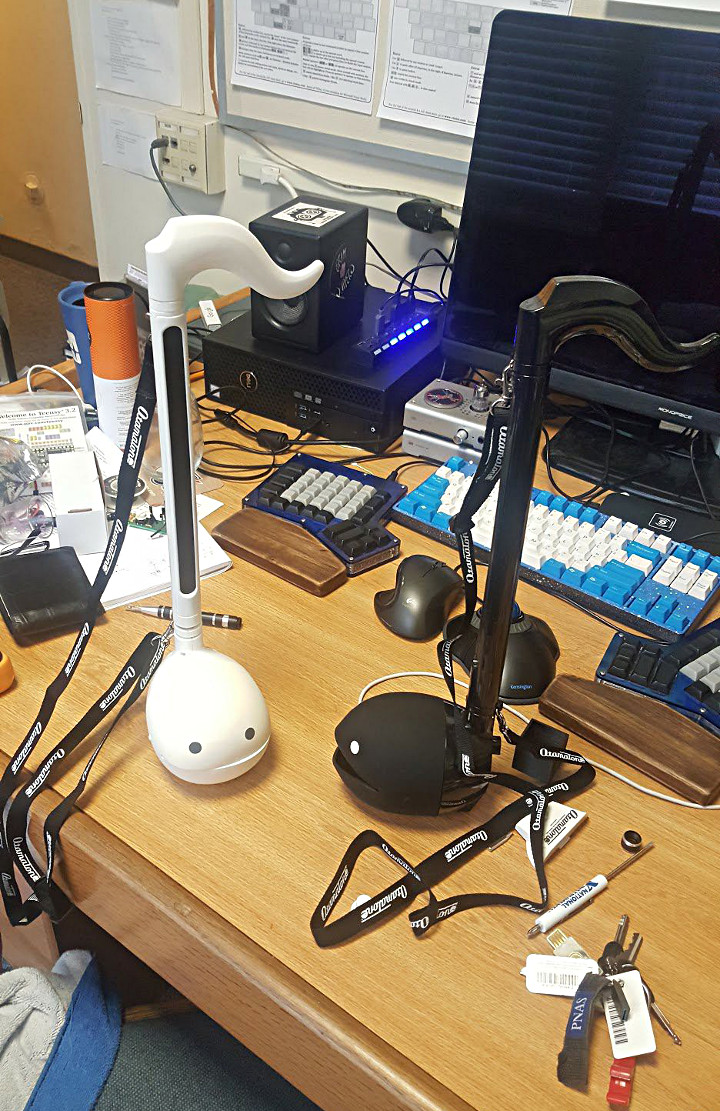
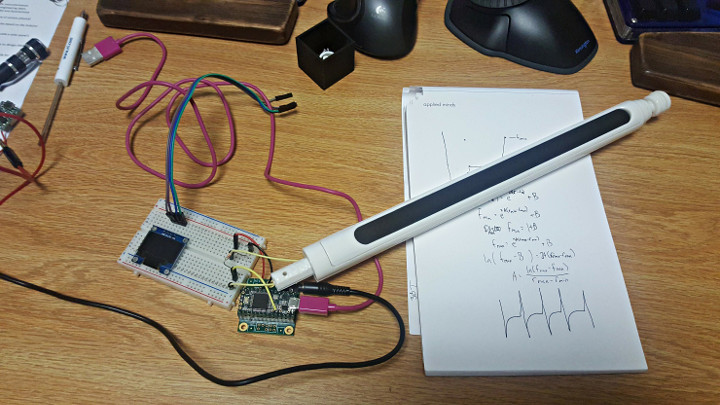
Evan is working on upgrading his Otamatone by replacing the internal analog synthesizer with a digital synth.
Using a Teensy 3.2 paired with an audio shield, the project aims to put a digital synth in an Otamatone that will include presets that can be configured on the fly. This could be very useful in making the instrument a bit easier to play. After all, the world needs a better Otamatone.
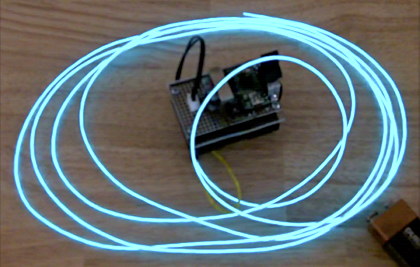
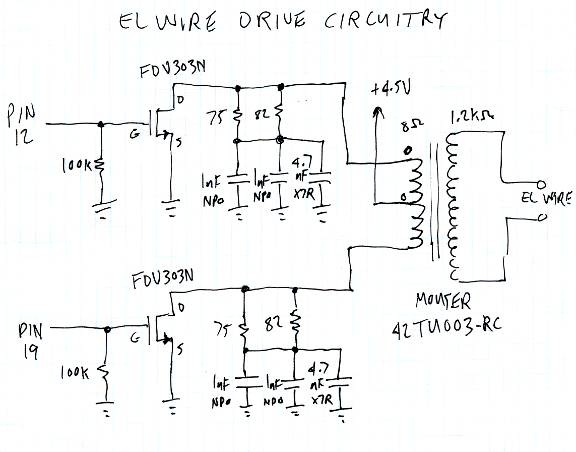
Years ago I experimented with shifting the color of El Wire by changing the AC frequency.
The color effect is subtle, but can be seen by most people with good color vision.
Not long after I published this video, I discovered “dcroy” built this same thing a few months before I did, and using only a 555 timer! Looks like it’s not as unique as I thought!
This is the schematic for the circuit I built. Most of the parts are small surface mount and they’re hidden under the transformer.
Here’s the code from the Arduino IDE. Pretty simple stuff. But beware, if you try this, it’s essential to drive each transistor for the same length of time, and not more than about 1ms. If you drive one more than the other, or leave either on too long, the transform sees a DC or low frequency signal. That could result in far too much current, probably destroying the transistors if the battery is fresh.
const int pin1 = 12;
const int pin2 = 19;

void setup() {
  Serial.end();  // USB off, to save power
  for (byte i=0; i<25; i++) {
    pinMode(i, OUTPUT);    // all unused pins low
    digitalWrite(i, LOW);  // to avoid wasting power
  }
  pinMode(pin1, OUTPUT);
  pinMode(pin2, OUTPUT);
}

unsigned int us = 250 * 64;
const int usMax = 500 * 32;
const int usMin = 120 * 32;
byte dir = 0;

void loop() {
  digitalWrite(pin1, HIGH);
  delayMicroseconds(us / 32);
  digitalWrite(pin1, LOW);
  if (dir) {
    us = us + 1 + us / 2048;
    if (us >= usMax) dir = 0;
  } else {
    us = us - 1 - us / 2048;
    if (us <= usMin) dir = 1;
  }
  digitalWrite(pin2, HIGH);
  delayMicroseconds(us / 32);
  digitalWrite(pin2, LOW);
}
This article was originally published on the DorkbotPDX website, on July 12, 2011. In late 2018, DorkbotPDX removed its blog section. An archive of the original article is still available on the Internet Archive. I am republishing this article here, in case anyone might wish to try El Wire color changing. Admittedly, El Wire became less popular around 2013 when inexpensive LED strips appeared on the market, but it still offers interesting effects which are hard to accomplish with LEDs.
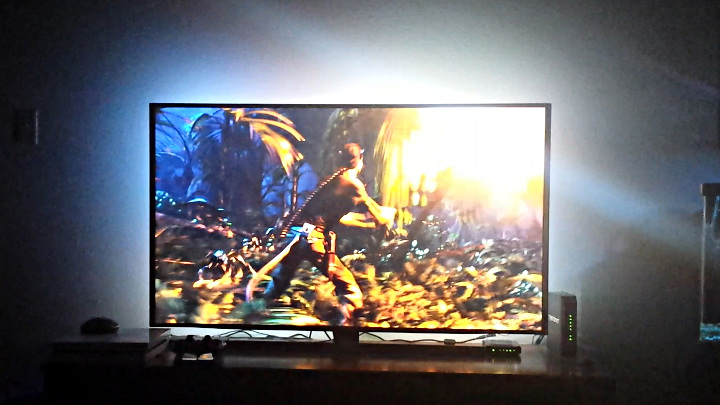
David Henderson and his brothers installed their own ambilight on the back of their new TV and the end result looks awesome.
Ambilight is a technology by Philips that uses LEDs mounted on the back of their TVs to add ambient light. David retrofitted his TV using a total of 100 addressable LEDs. The project uses a Teensy 3.2 and takes advantage of the FastLED library.
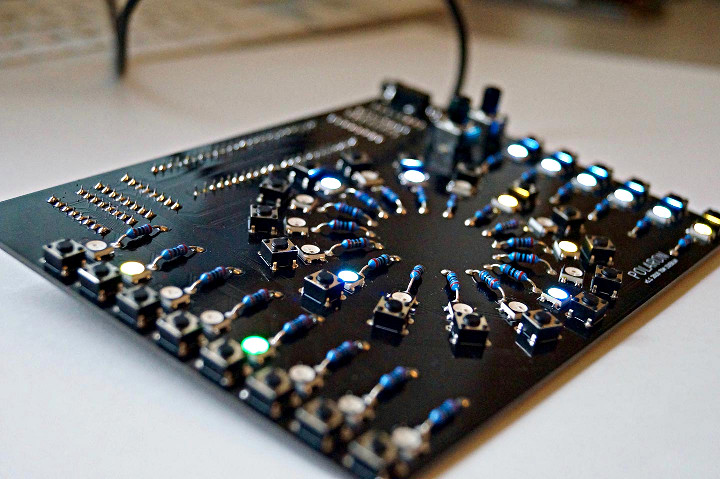
“A guy called Tom” made the Polaron, a 16 step, 6 track digital DIY drum machine.
Driven by his curiosity to understand and experiment with interaction patterns on digital musical intruments, Tom made the Polaron. It combines features from other drum machines that he knows and loves as well as new features he found useful during development. The current list of features includes:
16 step sequencer
6 instrument tracks
2 pots for parameter control
parameter locks: all instrument parameters can be recorded for each step
different pattern length for each instrument track
midi sync
crunchy 12bit stereo outputs
This video show the Poaron in action with a Waldorf Blofeld keyboard synthesizer
The project is fully open source with the code available on GitHub
There is also Wiki page available with instructions on how to build your own
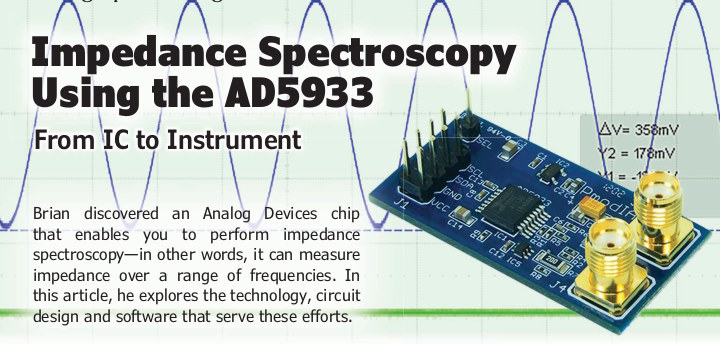
Measurement of impedance over a range of frequencies can be useful for testing speakers & microphones, monitoring corrosion in metals, and biomedical applications. Pick up a copy of Issue #344 for the full build details, including schematics & access to the software.
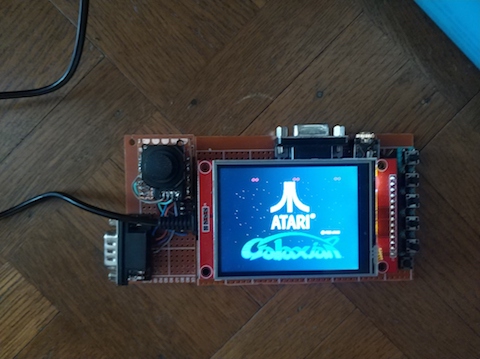
Jean-Marc Harvengt has done some pretty amazing work with a collection of console emulations, including the Atari 2600/5200, NES, Colecovision, and Philips Odyssy.
Jean-Marc was inspired by Frank Bösing’s work on emulating the Commodore 64. Currently the collection supports the Atari2600, Philips Videopac/Odyssey, colecovision, NES and Atari 5200 consoles; and the Zx80/Zx81, Zx Spectrum, and Atari800 computer cores.
All the emulators support both ILI9341 TFT and VGA output.
There’s some pretty amazing work going on here that brings up some serious nostalgia.