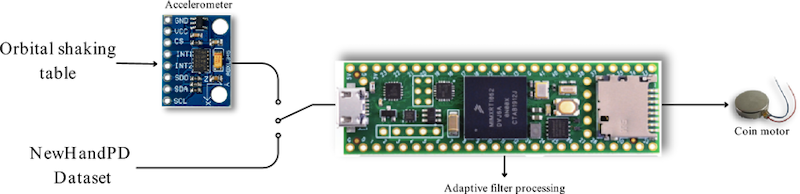
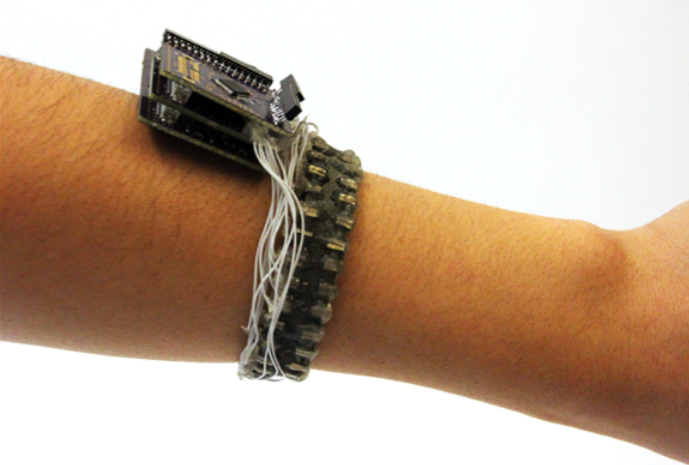
Researchers Jéssica Cristina Tironi, Anita Fernandes, Renata Coelho Borges, Luis Augusto Silva, and Wemerson Delcio Parreira have developed a prototype self-stabilizing pen that counters hand tremors in Parkinson’s patients.
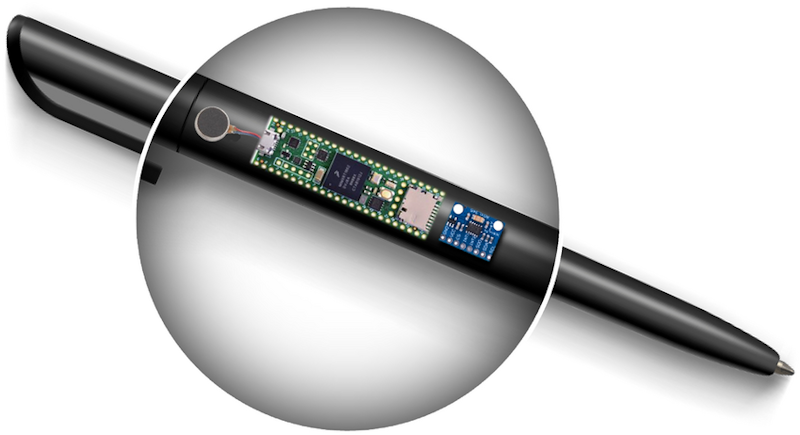
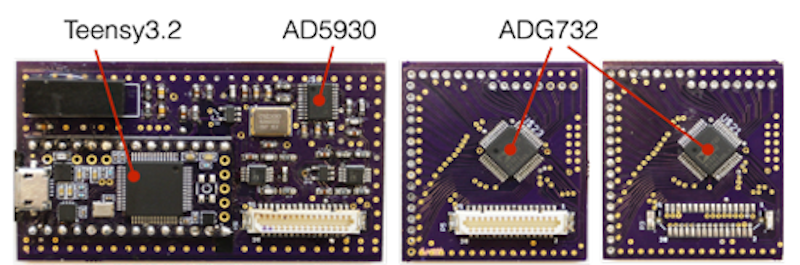
The system uses an Analog Devices ADXL345 accelerometer to monitor tremor oscillations, a Teensy 4.1 to analyze them in real time, and a vibration motor to dynamically counteract their effects. As seen in other tremor mitigation projects, a Kalman filter was employed to transform complicated data into useful outputs. While the initial prototype has provided encouraging outcomes, the researchers are considering adding additional sensors and further performance enhancements in a subsequent version. Dive into the original paper for more information.