Ethernet Library
The Ethernet library lets you connect to the Internet or a local network. You can create applications like web servers, or access web pages, send email or a variety of other internet functions.
| Download: |
Included with the Teensyduino Installer Latest Developments on Github |
Ethernet works with Teensy, and Teensy's "print" function includes block write optimizations that allow more efficient data transmission than standard Arduino.
Ethernet from Teensyduino supports W5100, W5200 and W5500 chips. The chip type is automatically detected.
Hardware Requirements
The simplest way to use Ethernet with Teensy 2.0 is the WIZ812 Adaptor Kit and WIZ812 Ethernet Module (made by Wiznet and sold by Saelig and other companies). For Teensy LC, 3.0 - 3.6, this WIZ820+SD Adaptor and the WIZ820io Module are recommended,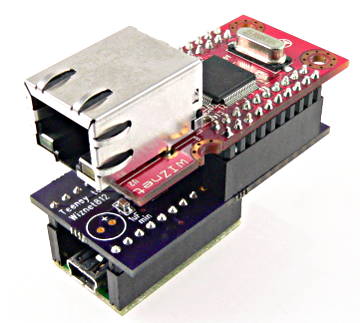
W5x00 must have chip select signal connected to Teensy pin 10.
Basic Usage
Ethernet.init(cspin);Configure which pin is used for the CS signal. Must be called before Ethernet.begin().
Ethernet.begin(mac, ip, gateway, subnet);Initialize the Ethernet library and hardware. "mac" and "ip" are required. "gateway" and "subnet" are optional.
Allowing Other Computers to Connect (Acting as a Server)
Server myserver = Server(port)Create a server that will listen for incoming connections on a specific port number.
myserver.begin()Begin listening for incoming connections.
Client myclient = myserver.available();Wait until somebody connects to the server port, then return a Client object that can be used for communicating.
Connecting to Other Computers (Acting as a Client)
Client myclient = Client(ip, port)Create a client object that will connect to another computer at a specific IP number and port number.
myclient.connect()
Make the connection. Returns true if the other computer accepted the connection.
Communicating While Connected
myclient.print(data)Send data.
myclient.available()Check if any data has been received and is available to read.
myclient.read()Read one byte received. -1 is return if no data received.
myclient.connected()Check if the other computer is still connected. Disconnecton is reported only after all data has been read.
myclient.stop()Disconnect from the other computer.
Example Program
The Ethernet Library comes with examples, like this simple web server which can be accessed from any browser.
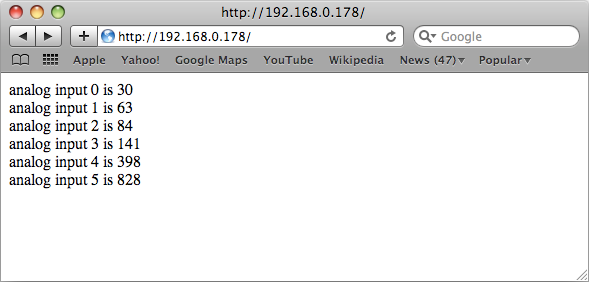
This example code can be loaded from the File > Examples > Ethernet > WebServer menu.
You must edit the IP number to a number which is appropriate for your local Ethernet network.
Some Ethernet examples will only run with the Arduino Serial Monitor open. To allow these examples to work without the serial monitor, find and delete this code:
   while (!Serial) {
    ; // wait for serial port to connect. Needed for Leonardo only
   }
WIZ812MJ Module Connections
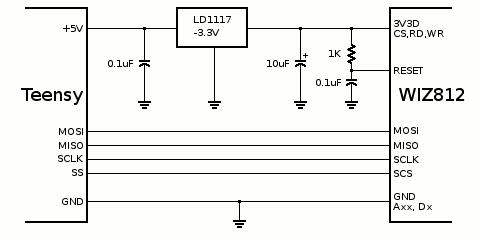
The WIZ812 Adaptor Kit is the easiest way to use the WIZ812 Ethernet module. But it can also be connected with only 6 wires.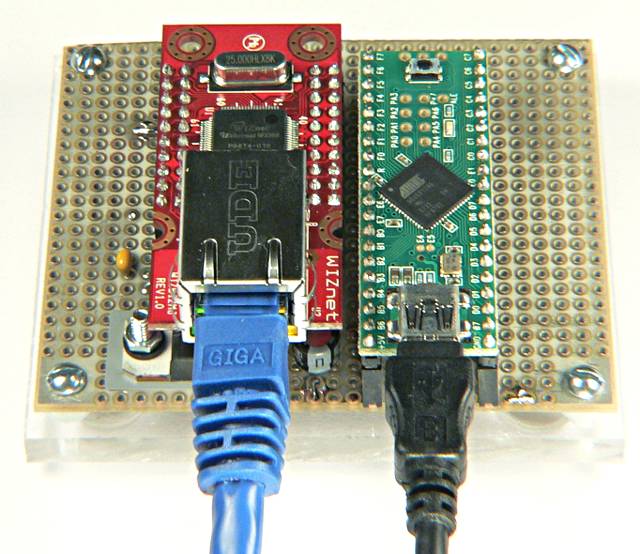
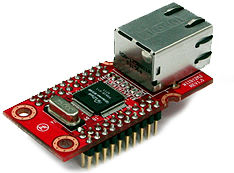 |
WIZ812MJ Ethernet Module
|
Only 4 signals (MISO, MOSI, SCLK, SS), plus 3.3 volt power and a reset are required to make the WIZ812MJ work with Teensy or Teensy++. The WIZ812MJ has many pins, but nearly all connect to ground or 3.3 volts, or aren't used at all.
| Pin Function | Teensy 1.0 | Teensy 2.0 | Teensy++ 1.0 | Teensy++ 2.0 | Teensy 3.0 |
|---|---|---|---|---|---|
| MISO | 11 | 3 | 23 | 23 | 12 |
| MOSI | 10 | 2 | 22 | 22 | 11 |
| SCLK | 9 | 1 | 21 | 21 | 13 |
| SS | 8 | 0 | 20 | 20 | 10 |
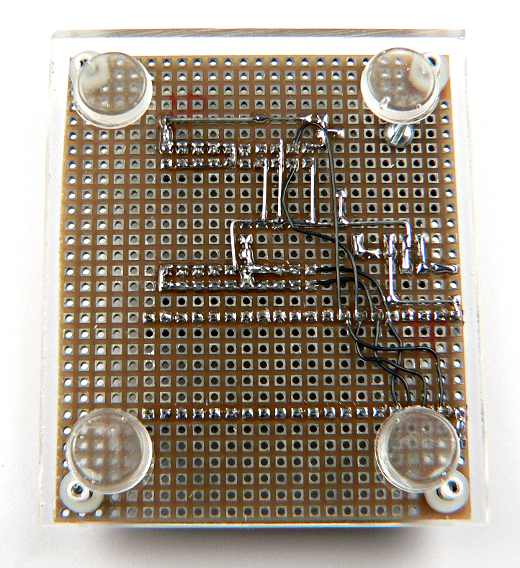
This bottom side view of the WIZ812MJ can make connecting the wires much easier.

Here is the wiring used for the board used to test Ethernet on Teensy. The 4 signals lines are connected to both Teensy 2.0 and Teensy++ 2.0 pins, so either board may be plugged in. Normally you would only connect to the correct 4 pins to avoid losing use of the other 4 in your application.