WIZ820io & Micro SD Card Adaptor
| Discontinued | WIZ820_SD_ADAPTOR | Teensy 3 to WIZ820io & SD Card Adaptor | $6 |
This adaptor allows you to easily use gigabytes of SD card flash memory and/or a Wiznet WIZ850io or WIZ820io ethernet module with Teensy LC, 3.0, 3.1, 3.2, 3.5 and 3.6.
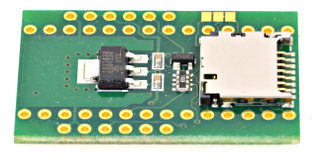 Rev2 |
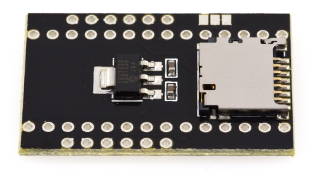 Rev 1 |
The WIZ820io/WIZ850io can be purchased from Mouser Electronics, Digikey, Saelig and other electronic component distributors. Inexpensive WIZ850io clones can be found on Ebay or Aliexpress. PJRC does not sell the any these ethernet modules.
WIZ850io (W5500 chip) should be used for new designs. WIZ850io has all the features of the older WIZ820io (W5200), with lower power consumption, and at lower cost.
Reset Signal
WIZ820io requires a reset pulse to function properly. WIZ850io is more tolerant of startup without reset, but a pulse on the reset pin is absolutely required for the older WIZ820io modules.This adaptor has a CAT811T reset chip to automatically pulse reset at powerup. However, after uploading a new program, your WIZ820io may be left in a prior state depending on where your prior program stopped. Pin 9 should be used to manually trigger the reset pulse for best compatibility with WIZ820io and W5200 chips. See the initialization code below for an example.
Rev 2 - Easier SPI Sharing
A second revision adds pullup resistors on pins 4, 9 and 10, and a reset chip for the WIZ820io.These resistors keep the SD card and WIZ820io/WIZ850io from responding to other SPI communication. Some WIZ820io can disrupt SPI communication before being reset, even of their chip select pin is pulled high. The new reset chip guarantees proper reset at startup, even if the recommended code below is not used.
Recommended Assembly Steps
Place the header pins in a breadboard or other fixture to hold them straight and at the correct spacing. Position the WIZ820_SD_ADAPTOR on the pins.Trim the 12 inner pins next to the WIZ820 pads.
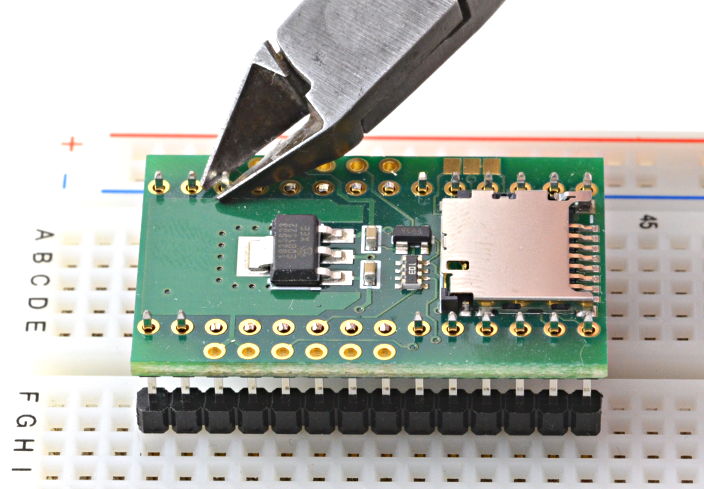
Solder the 28 header pins to the WIZ820_SD_ADAPTOR.
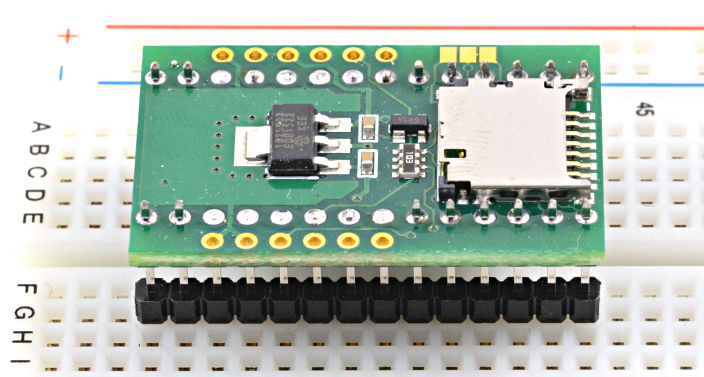
Solder the 12 WIZ820io pin to the WIZ820_SD_ADAPTOR.
Optionally, the WIZ820io pins can be placed into sockets and the sockets soldered to the WIZ820_SD_ADAPTOR, to allow the WIZ820io to be removed.
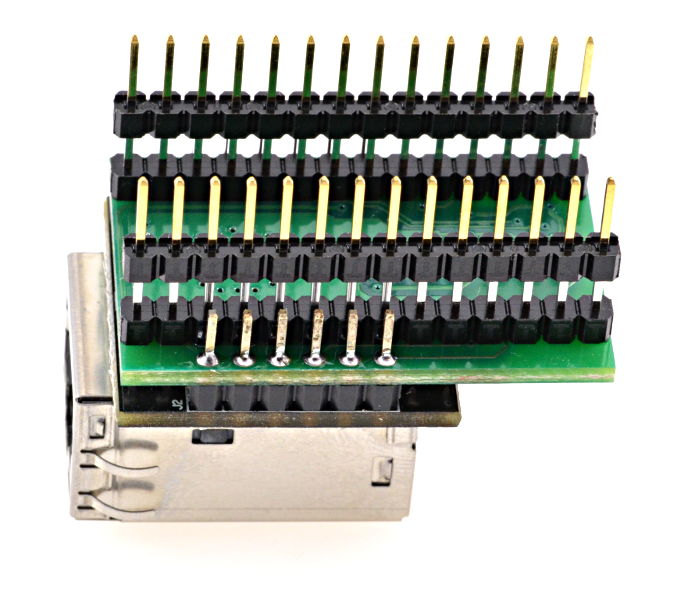
Solder the 28 header pins to Teensy 3.x.
Optionally, the header pins can be placed into sockets and the sockets soldered to the Teensy 3.x.
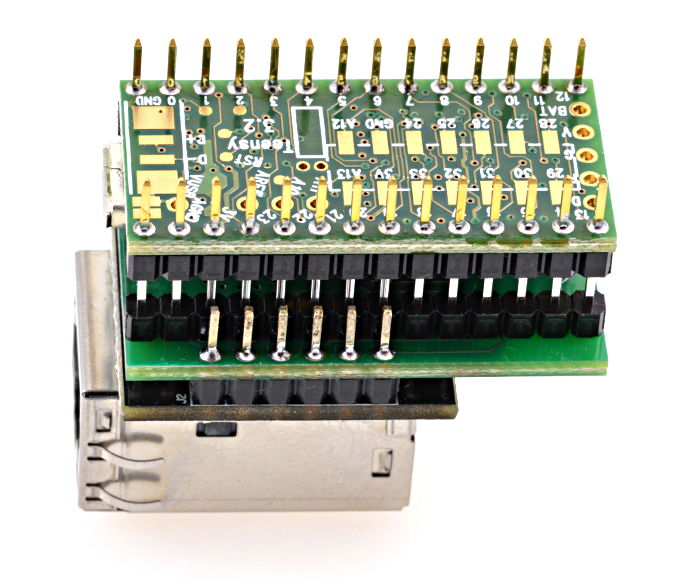
After assembly, the stack of boards should look like this:
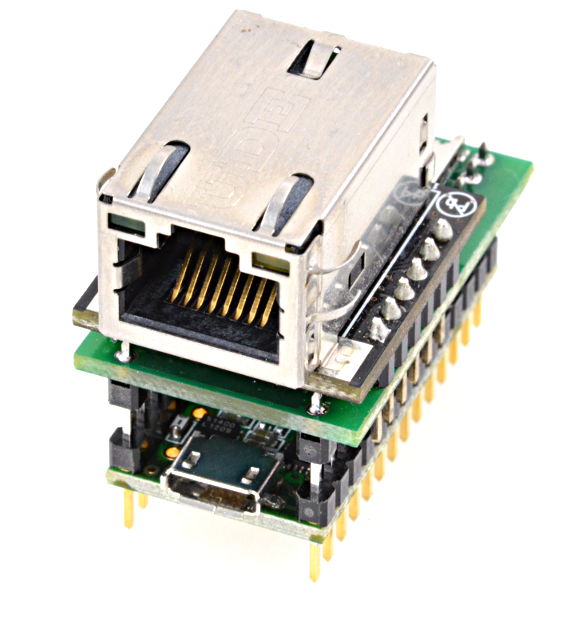
Electrical Connections
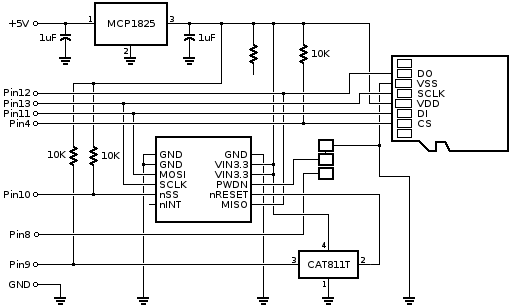
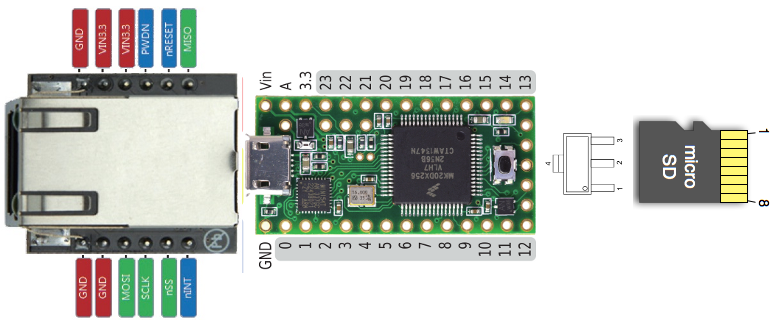
This table lists the electrical connections on this adaptor board.
The WIZ820io and SD card are connected to the default pins used by the Arduino Ethernet and SD libraries. For the SD library, pin 4 should be used in the begin() function.
Teensy3   SD Card   WIZ820io      MCP1825     JUMPER PADS
-------   -------   --------      -------     -----------
 4        2:CS
 8                                             Left Side
 9                  RESET
10:CS               SS
11:DOUT   3:DI      MOSI
12:DIN    7:DO      MISO
13:SCK    5:CLK     SCLK
VIN                               1:IN
          4:VDD     VIN33,VIN33   3:OUT
GND       6:VSS     GND,GND,GND   2:GND+TAB   Right Side
                    PWDN                      Center
By default, the center and right side of the jumper pads are connected, which keeps the WIZ820io powered up. For low power applications, the pads can be cut apart and the left+center joined to allow pin 8 to control the WIZ820io/WIZ850io powerdown feature.
Chip Select Pins During Initialization
Some SD cards can be sensitive to SPI activity while the Ethernet library is initilized before the SD library.For best compatibility with all SD cards, these 7 lines are recommended at the beginning of setup(). Pins 4, 9, and 10 will be reconfigured and controlled by the SD and Ethernet libraries.
void setup() {
  pinMode(9, OUTPUT);
  digitalWrite(9, LOW);    // begin reset the WIZ820io
  pinMode(10, OUTPUT);
  digitalWrite(10, HIGH);  // de-select WIZ820io
  pinMode(4, OUTPUT);
  digitalWrite(4, HIGH);   // de-select the SD Card
  digitalWrite(9, HIGH);   // end reset pulse