Tutorial 1: Software Setup
To use Teensy you will need the Arduino IDE software.Materials Required
- Teensy 4.0 with Pins
- Solderless Breadboard
- USB Cable
- Computer with USB
First Hardware Check
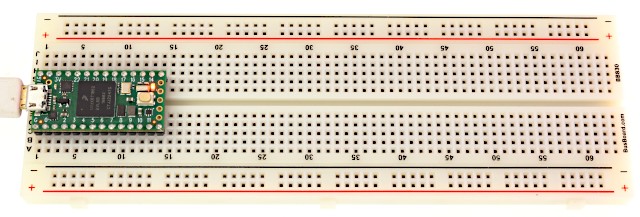
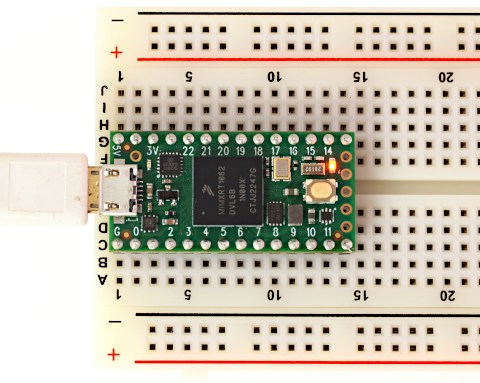
Before installing software, you can simple plug Teensy 4.0 in to check if it is working. First plug Teensy into the solderless breadboard, so it has a sturdy base, then connect the USB cable.
Every brand new Teensy is shipped with a LED blink program, so you should see the orange LED (upper right corner near the pushbutton) blinking slowly. If your Teensy has been previously used, it may have a program which does not blink the LED.
Press the pushbutton on Teensy. This puts Teensy into programming mode. The orange LED should stop blinking, because Teensy is no longer running the user program. The red LED (upper left corner near USB connector) should turn on to indicate programming mode. If the red LED blinks slowly, you have a power-only cable without data wires.
Install Arduino IDE Software
Download the Arduino IDE software from Arduino's website.https://www.arduino.cc/en/software/
After downloading, installation for each system varies slightly.
- Windows: Run the installer and follow install steps.
- MacOS: Copy to Applications and run. Allow access to Documents if asked.
- Linux: Extract ZIP file and run program.
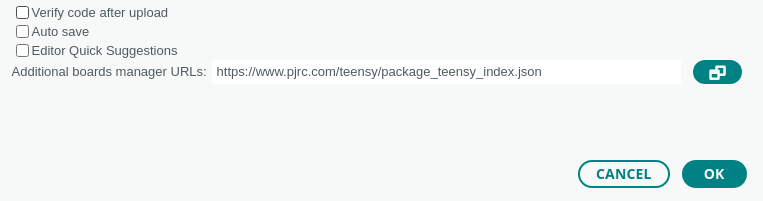
Add Teensy URL in Preferences
In the Arduino software, click File > Preferences. In "Additional boards manager URLs", copy this link:
https://www.pjrc.com/teensy/package_teensy_index.json
Install Teensyduino in Boards Manager
In the main Arduino window, open Boards Manager by clicking the left-side board icon, search for "teensy", and click "Install".
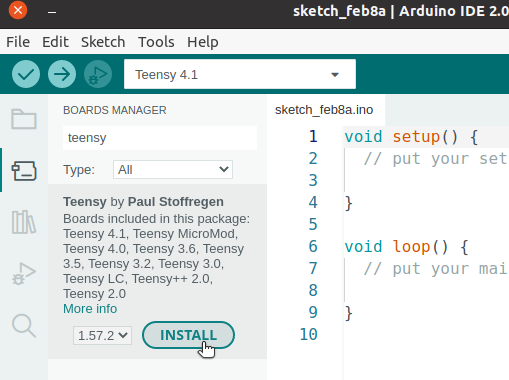
Installation may take a few minutes, depending on internet and computer speed.
(Linux Only) Install UDEV Rules
If you are using Linux, the 00-teensy.rules file must be copied to /etc/udev/rules.d/ to give non-root users permission to access the Teensy USB device.Load LED Blink
Select Teensy 4.0 in the drop-down menu. You may need to unplug and reconnect the USB cable or restart the Arduino IDE software to have it detect your board, if the software has just been installed.
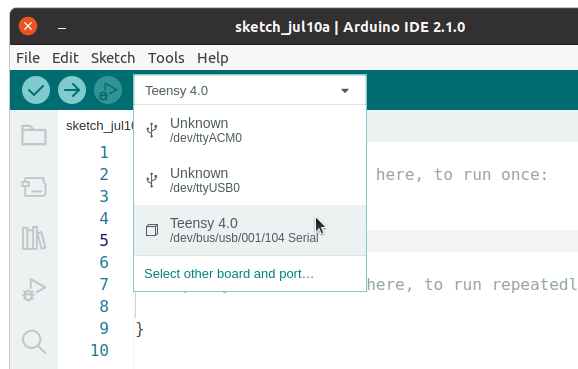
The specific info shown in this drop-down list varies between Windows, MacOS, and Linux. Teensy may appear with info for HID or Serial.
Open the basic LED blink program by clicking File > Examples > 01.Basics > Blink.

Then click Upload, which is the second icon in the top toolbar.
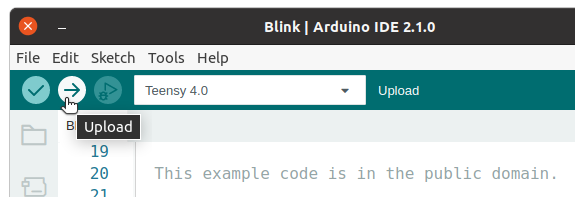
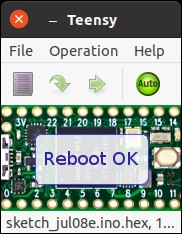
Arduino IDE will compile all the code, and then you should see the small Teensy Loader window appear to actually load the freshly built program onto your Teensy.
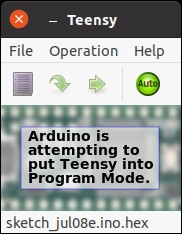
During uploading, you should see a progress bar on the Teensy Loader window, and the red LED on Teensy 4.0 should turn on to indicate programming activity. The process takes only seconds, and ends with "Reboot OK".
After loading, you should see Teensy again blinking its orange LED.
To confirm you really are programming Teensy, experiment with different delays in the blink program. Change the delay parameter from 1000 to 100 and upload to cause the LED to blink quickly.
When you are able to upload programs from Arduino IDE, you're ready to move on to tutorial #2 to start adding hardware on your breadboard and writing code to control it.